
Cart
0
Inspect the wall
Make sure the wall is structurally sound, clean, flat, dry and suitable to carry a fixed batten system.
A premium step-by-step guide for preparing your wall, installing battens or framing, setting out your first board, finishing corners and completing a clean composite cladding installation.
A quality composite cladding finish starts with a clean, structurally sound wall and a straight, ventilated subframe. Confirm the wall condition, cladding direction, corner finish and fixing method before cutting the first board.
Make sure the wall is structurally sound, clean, flat, dry and suitable to carry a fixed batten system.
Install battens perpendicular to the cladding boards, with consistent spacing across the full wall.
Decide whether you will use corner caps, butt joins, mitres or concealed trim before installing the first board.
Have a fine-tooth saw blade, drill, measuring tape, chalk line, spirit level, rubber mallet and safety gear ready.
Use this quick guide to estimate wall area, approximate board quantity and batten lines. This is for planning only, use the AusGrass Cladding Calculator for exact materials.
This calculator is a planning guide only. Final board quantities, trims, corners, caps, fixings, waste and batten quantities depend on board direction, wall shape, openings, cut layout and the cladding range selected.
Follow each stage in order. The subframe and first board alignment are the most important parts of the job, as any variation can carry through the full wall.
Install battens vertically where boards are running horizontally, or horizontally where boards are running vertically. Boards should fix to supports running perpendicular to the board direction.
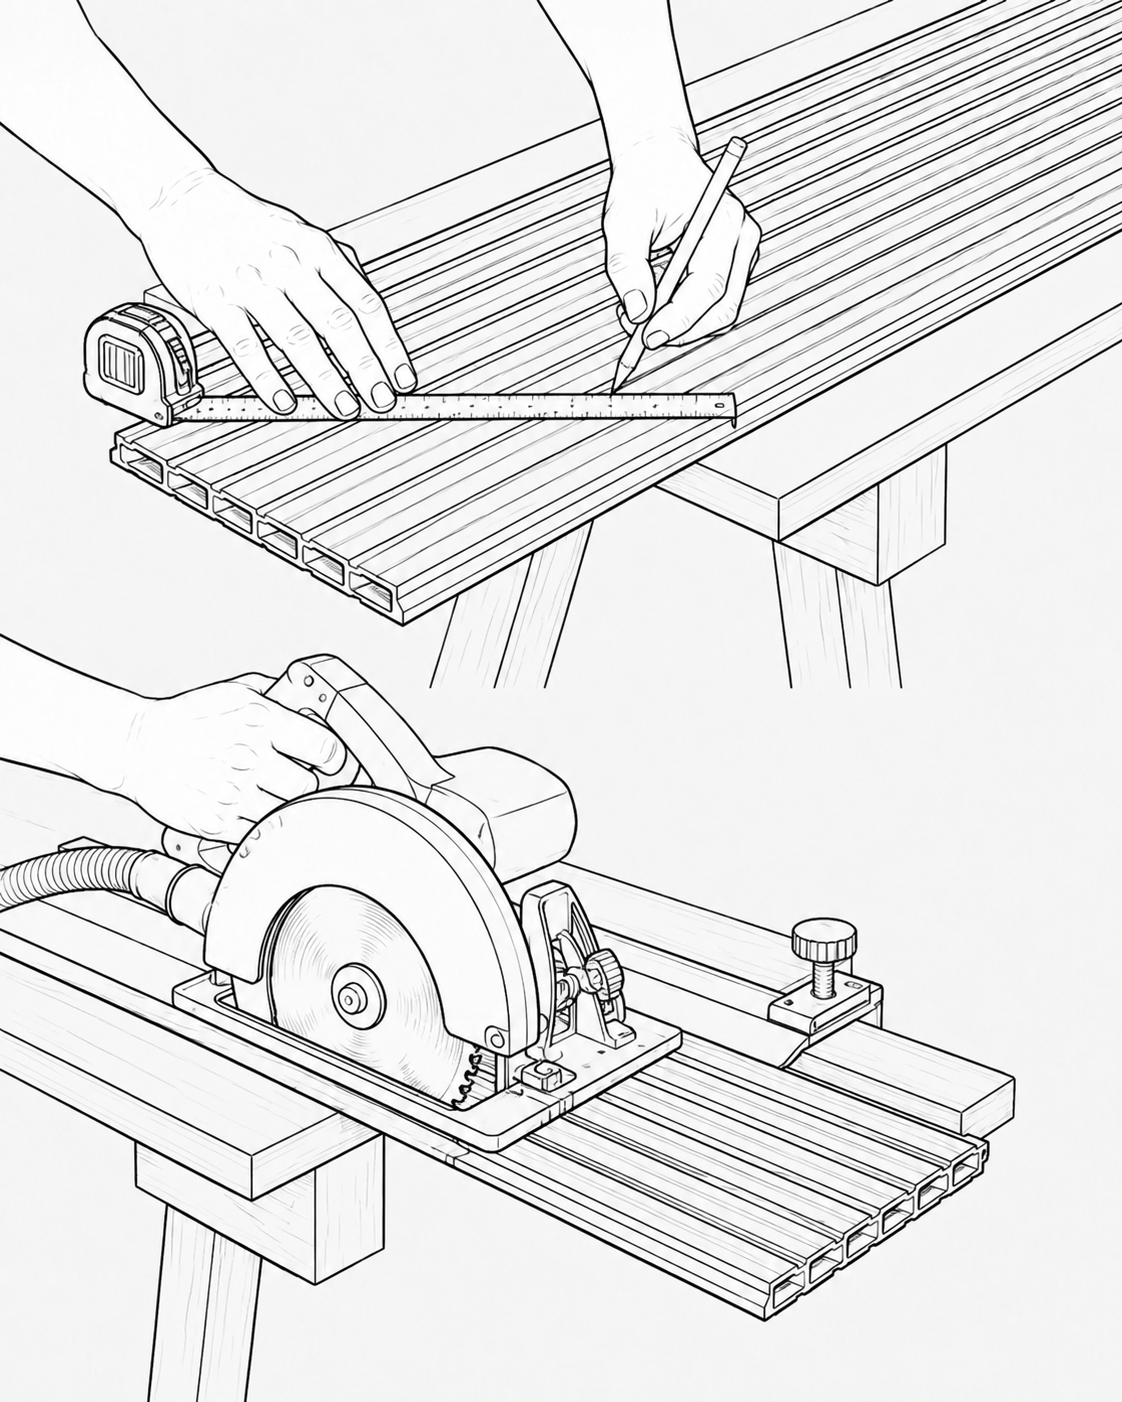
Measure the wall height and width carefully, then cut your cladding boards to suit the design and wall shape.
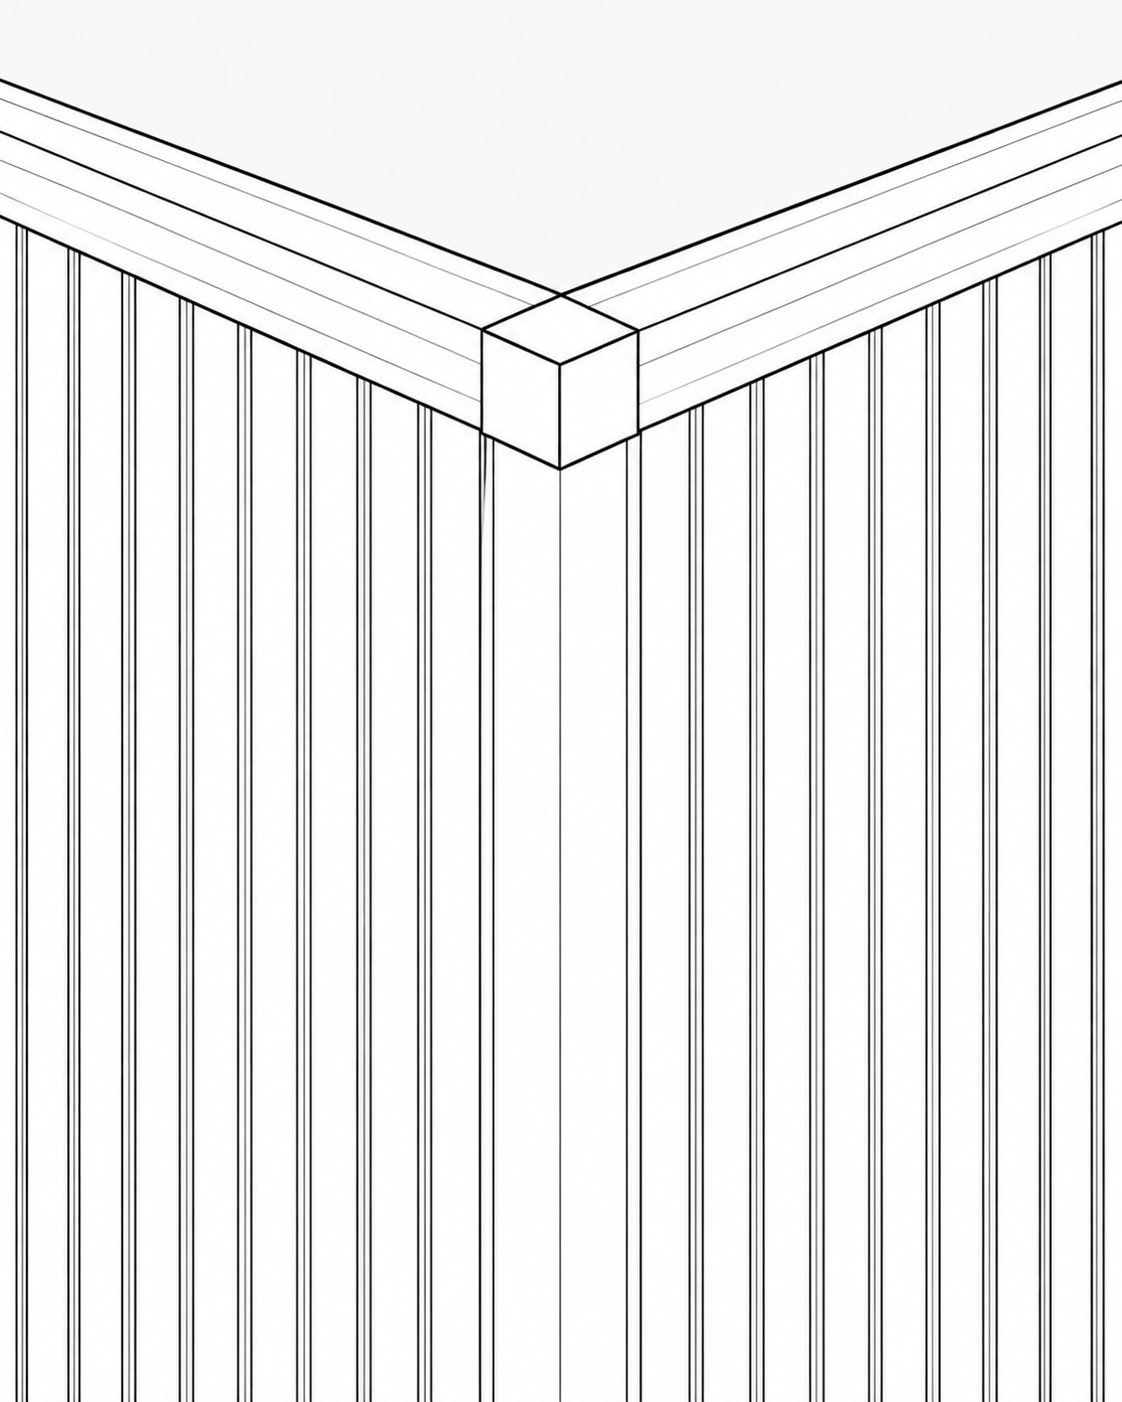
Decide how the internal and external corners will be finished before installing the first board.
Once the corner finish has been selected, install the first board carefully and check alignment before continuing.
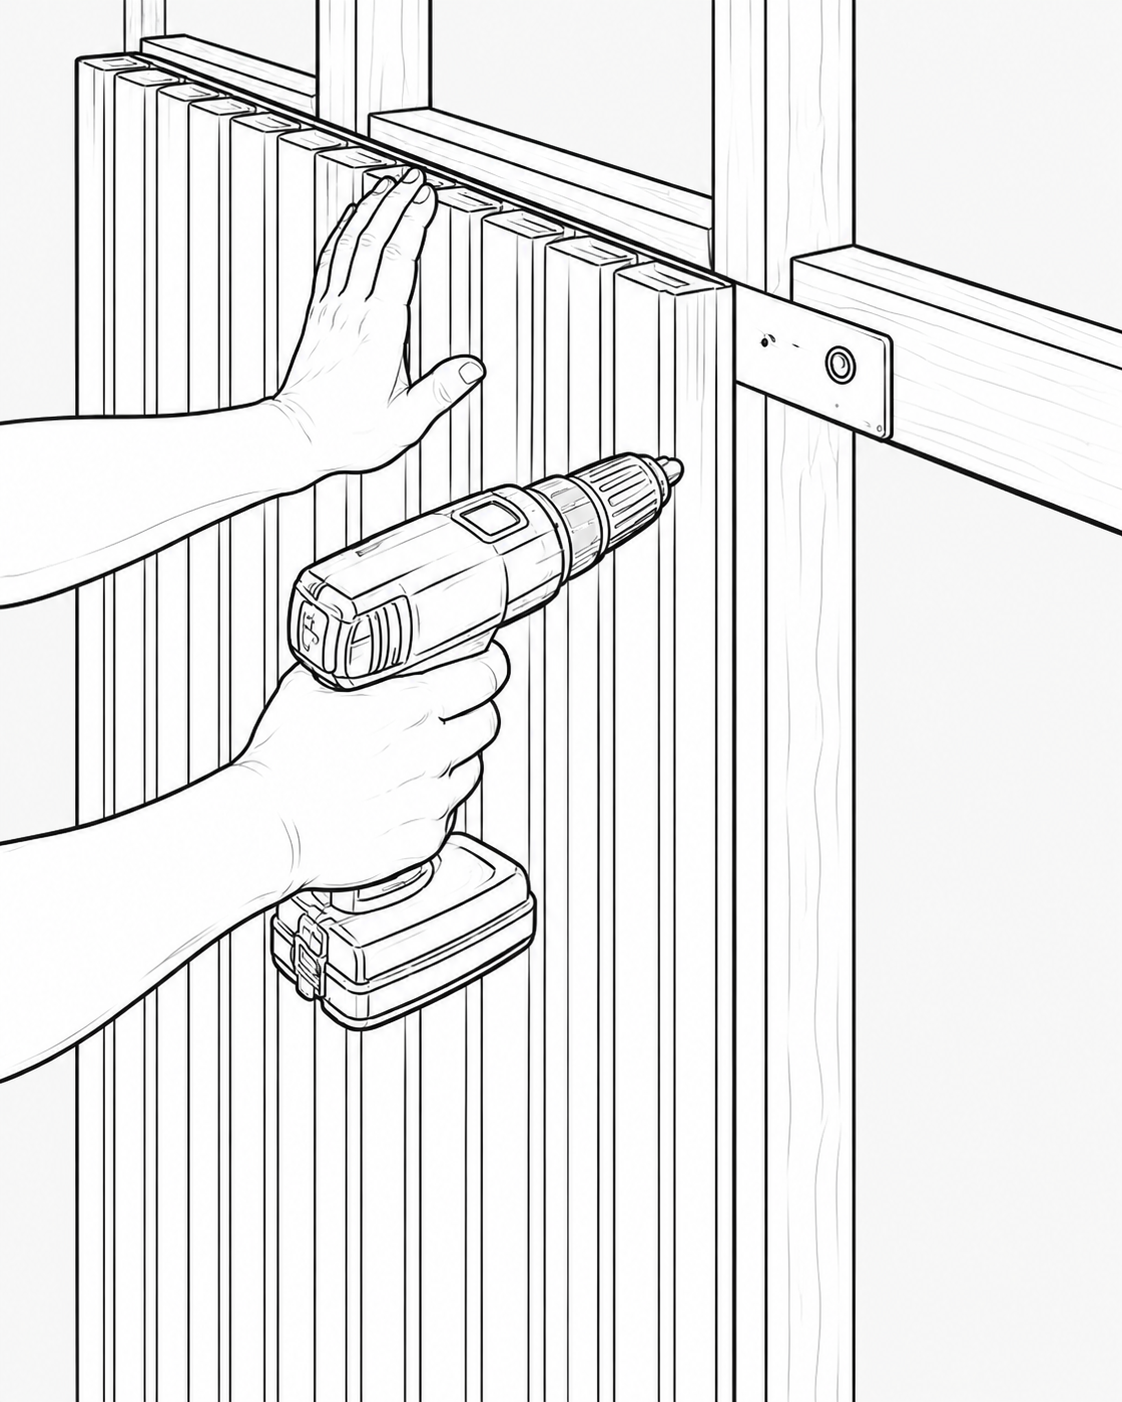
Continue the installation by sliding the next board into the previous board and fixing the tab to the battens.
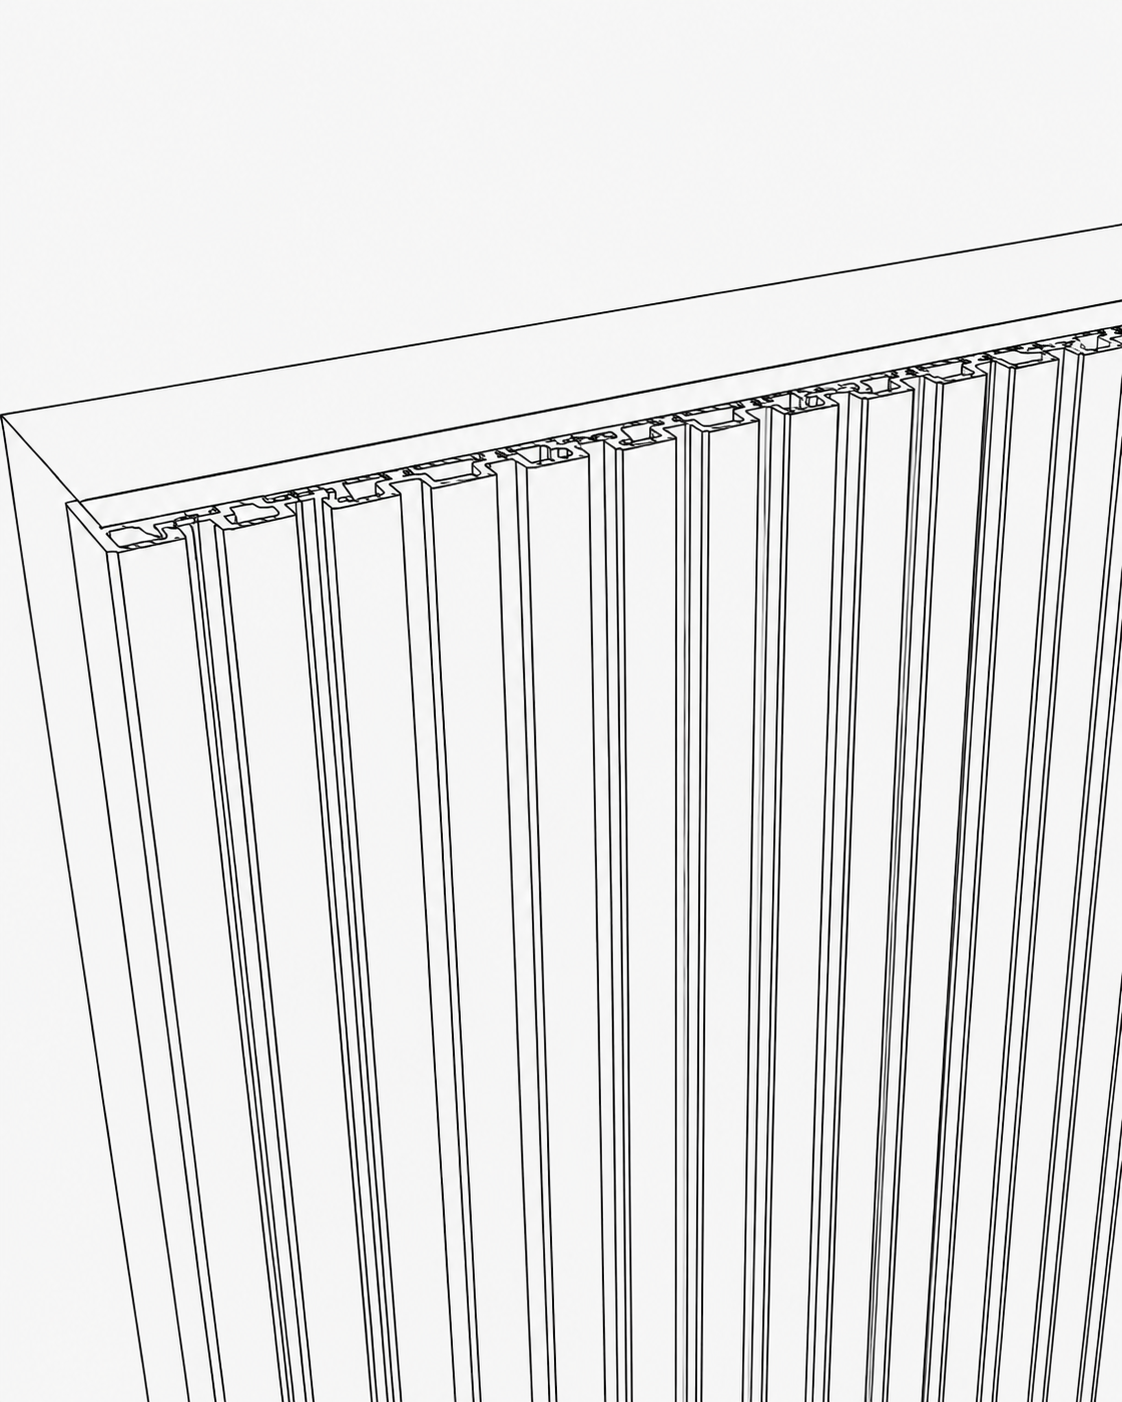
Where cladding turns onto another wall at a 90-degree angle, the corner detail will depend on whether it is an inward or outward corner.
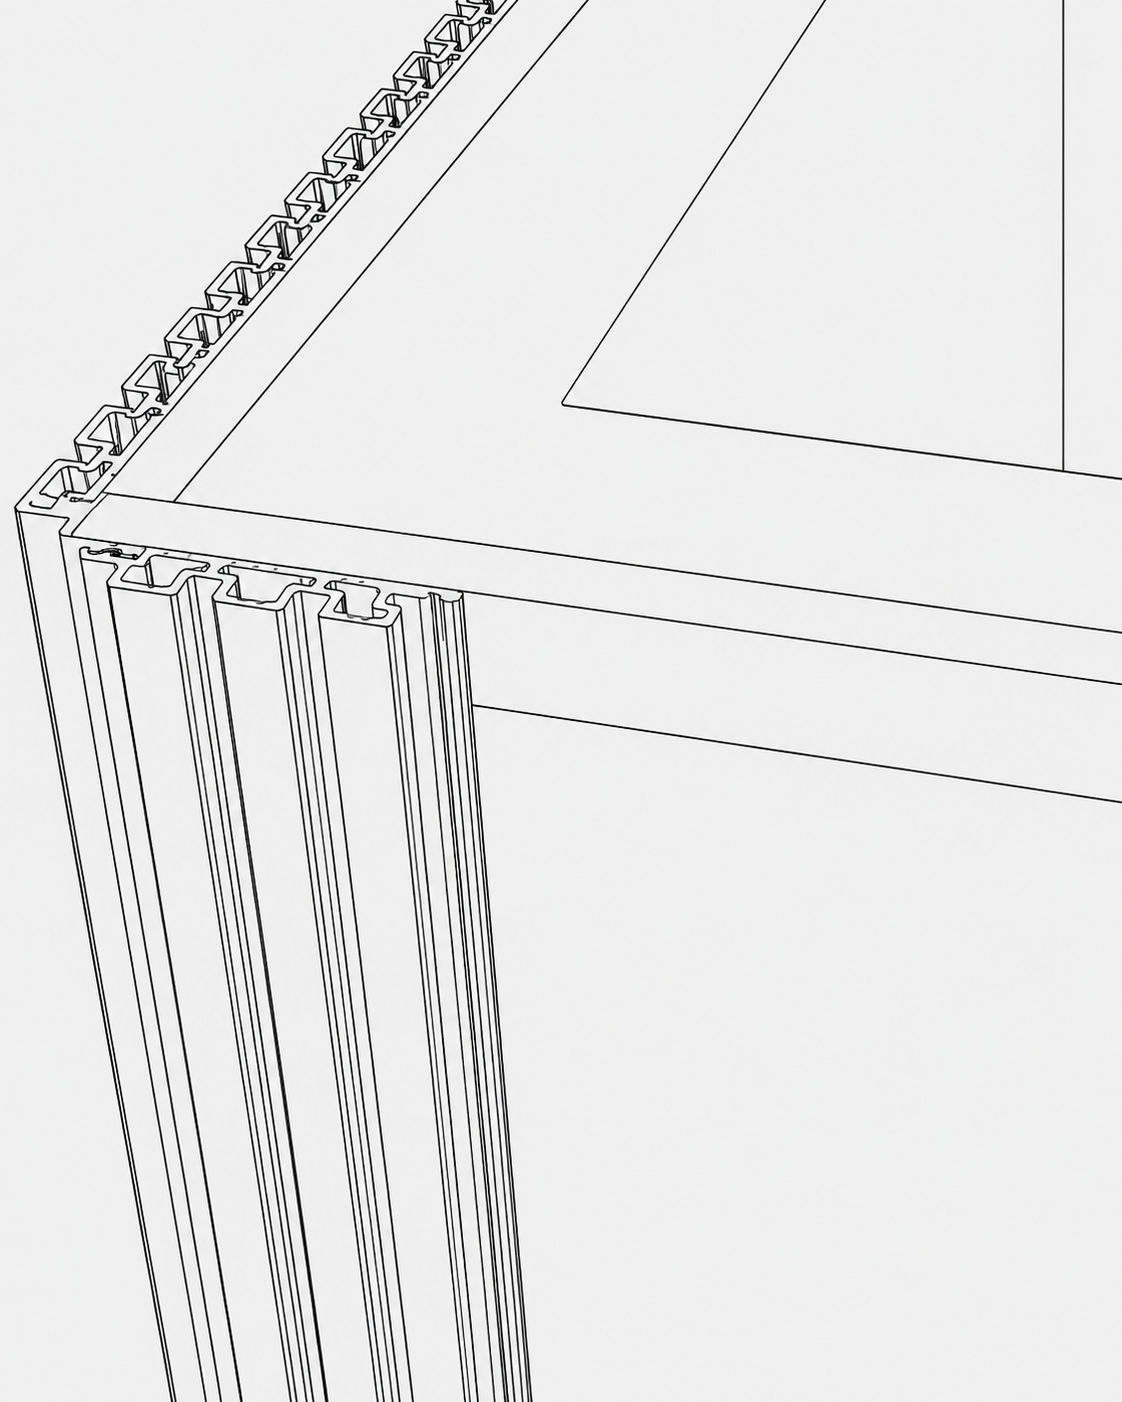
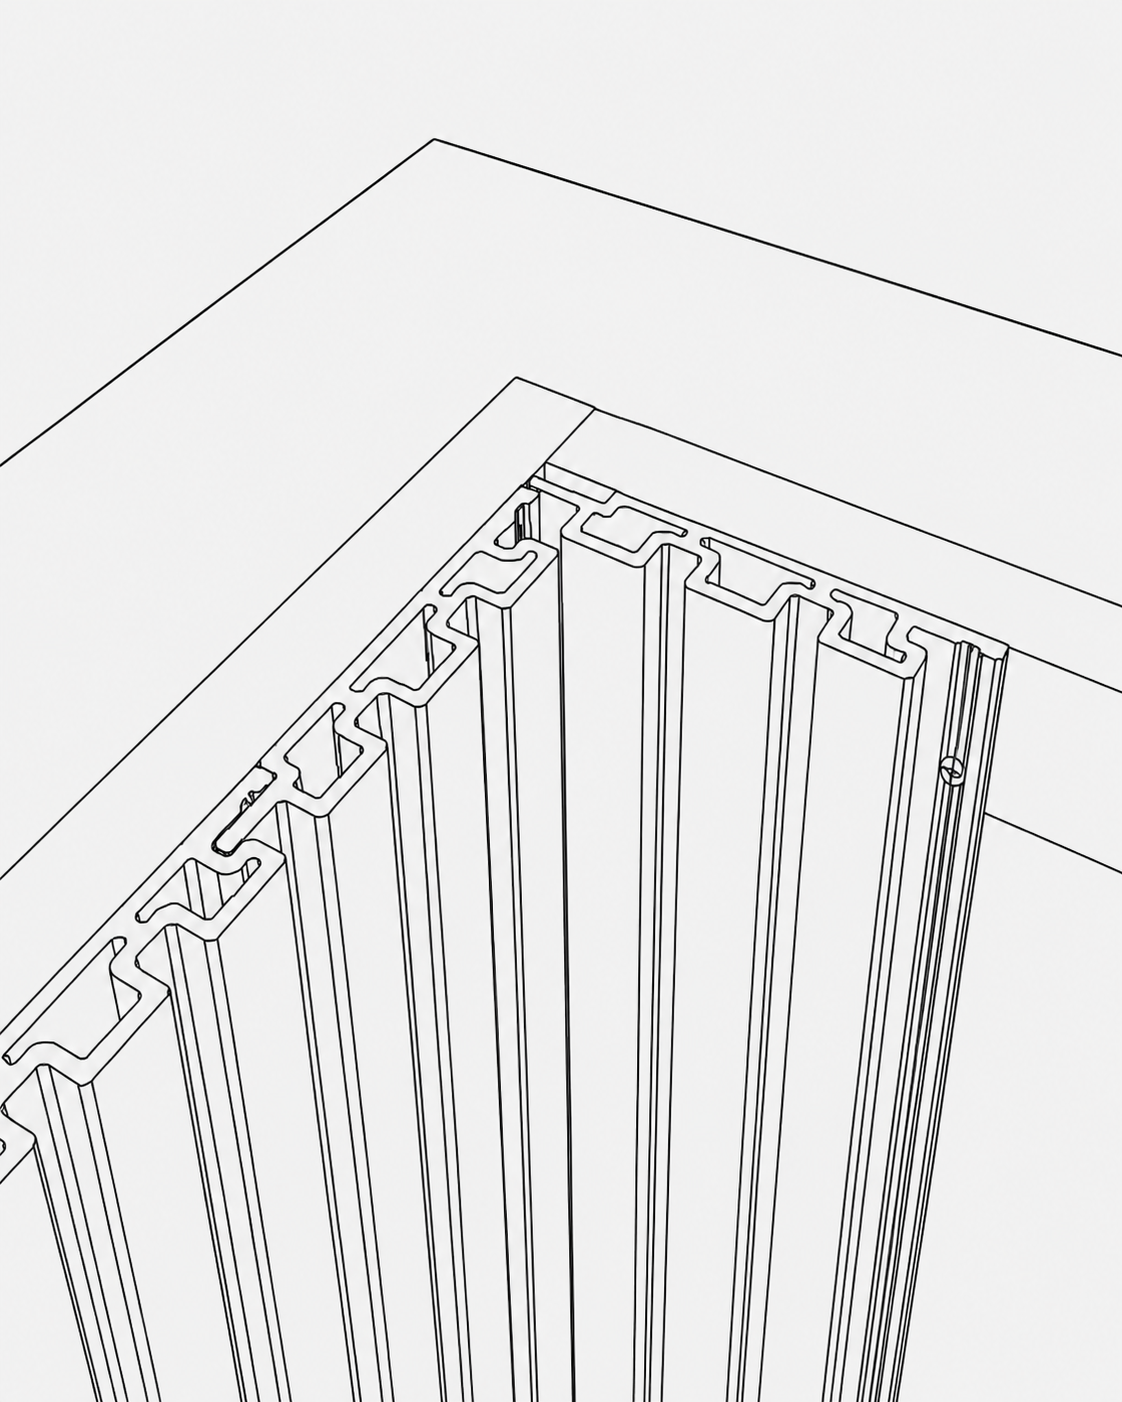
These details help customers understand batten direction, airflow clearance and corner finishing before installation begins.
Keep battens perpendicular to the cladding boards and spaced consistently.
Allow airflow and drainage beneath the cladding.
Use corner caps where a covered external corner finish is preferred.
Composite cladding is low maintenance, but simple care will help keep the wall cleaner and performing well over time.
Wash with water and mild cleaner when required. Remove dust, dirt, leaves and debris before they build up.
Keep bottom clearances and wall openings free from blockages so water can drain and air can circulate.
Avoid abrasive cleaners, hard impact and dragging sharp items across the cladding face.
| Issue | Likely cause | Prevention or fix |
|---|---|---|
| Boards look wavy or uneven | Battens are not straight, level or packed correctly. | Pack low spots and check the batten plane with a straight edge before installing boards. |
| Water collects behind cladding | Insufficient drainage or bottom clearance. | Maintain a minimum 5mm clearance and avoid blocking drainage or ventilation paths. |
| Visible misalignment | The first board or corner finish was not set straight. | Use a chalk line, level and dry-fit before fixing the first board permanently. |
| Corner finish does not line up | Corner choice was not planned before board installation. | Decide on cap, butt, mitre or overhang finish before cutting boards at the corner. |
For non-timber walls such as concrete, brick or metal, battens should be fixed securely to the wall first so the cladding has suitable support and ventilation behind it.
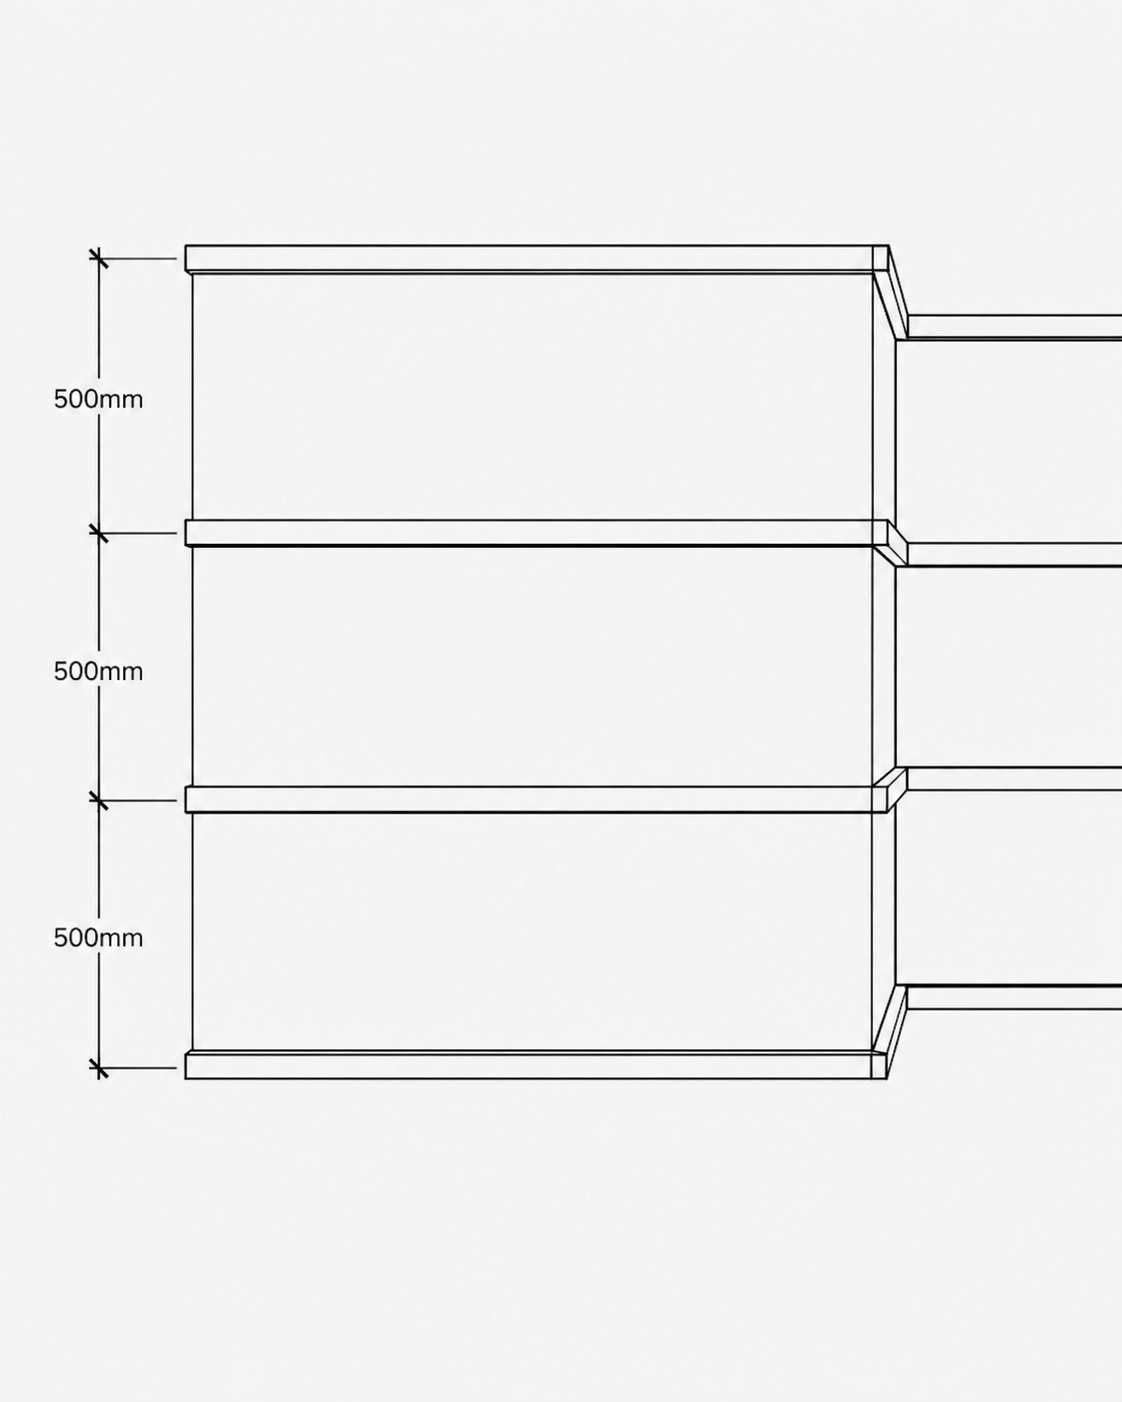
For standard wall applications, batten spacing should generally not exceed 500mm unless an engineered design or project instruction allows otherwise.
Battens should run perpendicular to the cladding boards. Vertical cladding uses horizontal battens, and horizontal cladding uses vertical battens.
Allow a minimum 5mm clearance at the bottom of each cladding board for airflow, drainage and movement.
The general process is similar, but different cladding ranges can vary slightly in fixing method. The Slimline range uses a stainless steel clip and screw system.
Choose your cladding range, calculate the materials required and confirm the correct corner caps, fixings and subframe before starting your project.
Follow this simple DIY guide on how to install composite wall cladding. If you have any other questions, don't hesitate to contact us

Copyright 2025 Ausgrass

